Converting Models to XPL
The Convert Models to XPL tool converts 3D model files to the Skyline proprietary XPL2 file format, creating a set of XPL files where each file contains data for one Level of Detail (LOD). When displaying an XPL model, TerraExplorer dynamically selects and displays the best LOD file based on the viewer position in relation to the object. When downloaded from a web server, each file is also downloaded independently. This results in an improvement in overall model display performance as well as download rate.
The Convert Models to XPL tool offers the option to accelerate loading speed and consume less memory by using multi-resolution geometries in addition to multi-resolution textures. Performance can be further enhanced by combining models into streaming optimized groups and/or by using unified textures to dramatically reduce computer and graphic resource usage.
XPL files are optimized for TerraExplorer and Internet environments.
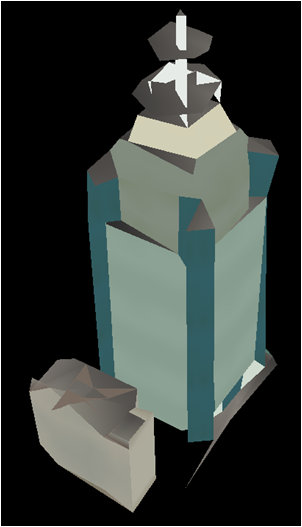

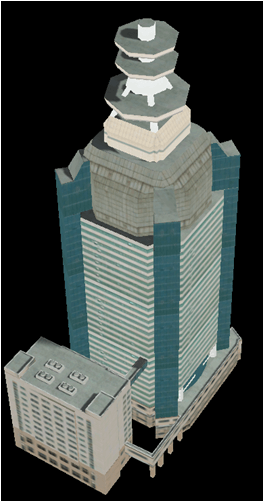
Geometry Level 1 Geometry Level 2 Geometry Level 3
The Convert Models to XPL tool supports the following formats:
§ COLLADA (DAE)
§ Direct X (X) and its compressed version (XPC)
§ XPL – old format
§ 3DS - 3D studio format for exchanging 3D data models
§ OpenFlight (FLT) – Multigen format for exchanging 3D data models and its compressed version (FPC)
Models to XPL Tool
To use the Models to XPL tool:
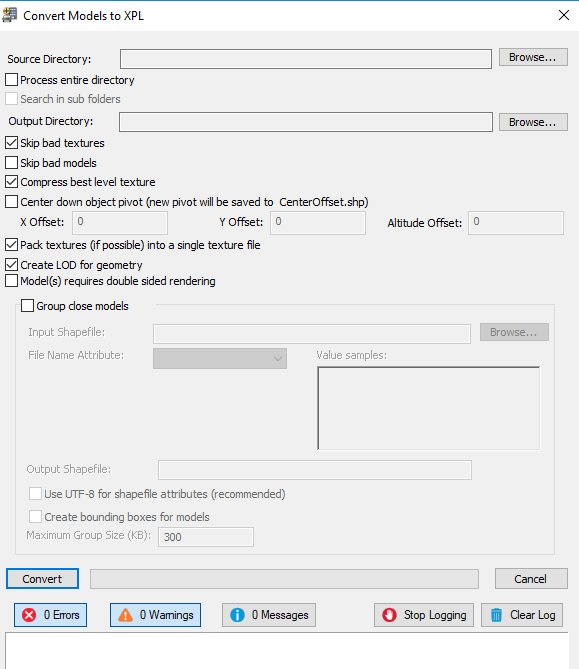
1. On the Layers tab, in the 3D Mesh group, click Models to XPL. The Convert Models to XPL dialog is displayed.
2. If you want to process a single file, browse to the required Source directory and select the required file.
3. If you want to process an entire source directory, select the Process entire directory check box. Then browse to the required Source directory and click OK.
§ Select the Search in subfolders, if you also want to search in the directory’s subfolders.
4. Browse to the required Output directory. All created XPL2 files will be saved to this directory.
5. Select or clear the check boxes of the following options:
|
Option |
Description |
|
Skip bad textures |
If selected, Convert Models to XPL ignores any texture files that cannot be converted (e.g., unsupported formats). If this check box is cleared, the Convert Models to XPL process will abort processing if a bad texture is encountered. |
|
Skip bad models |
If selected, Convert Models to XPL ignores any models that cannot be converted (e.g., unsupported formats). If this check box is cleared, the Convert Models to XPL process aborts processing if a bad model is encountered. |
|
Compress best level texture |
Compression reduces storage space and improves performance. |
|
Center down object pivot |
If all the models share the same pivot and also need to be centered down, select the check box and type the real geographic coordinates of the shared pivot point in the X, Y, and Altitude offset fields. |
|
Pack textures to a single texture file |
Merge texture information into a single file. The sub-textures are rendered by modifying the texture coordinates of the object's UV map, essentially telling it which part of the image its texture is in. When textures are packed in a single file, they are treated as a single unit by the graphics hardware, resulting in faster model rendering. |
|
Create LOD for geometry |
When this option is selected, multi-resolution geometries will also be created (in addition to multi-resolution textures). Using multi-resolution geometries will generally accelerate loading speed and consume less memory. |
6. A single XPL file can be created for the lower resolution levels of multiple models that are in close proximity. This is particularly useful for small models. If you want to Group close models of XPL model files, select the check box, and enter the following information:
|
Field |
Description |
|
Input shapefile |
Browse to the file that contains the models’ positioning information. |
|
File name attribute |
Select the shapefile attribute that contains the model file name for each feature. (The symbol for each shapefile point feature is based on this attribute, so that each model is positioned in the correct position on the terrain.) |
|
Output shapefile |
Type the path of a shapefile that will store the models’ modified referencing and grouping information. |
|
Use UTF-8 for shape attributes |
Use UTF-8 for international language support. UTF-8 is a variable-length character encoding for Unicode that is able to represent any universal character in the Unicode standard. |
|
Create bounding boxes for models |
If selected, Convert Models to XPL creates a simple bounding box element around each model object. The color of the bounding box is based on the dominant color among the model’s textures. The bounding boxes are included in the modified shapefile attribute and can display a general outline of the model while the model is being rendered in the 3D Window. |
|
Maximum group size |
TerraExplorer will group together XPL files of models that are located in the same area without exceeding the designated grouped model size. When the maximum group size is reached, a new group is created from remaining elements in the same area. |
7. Click Go.