Searching and Performing Operations by Attribute (Attribute Table Tool)
Attribute Table
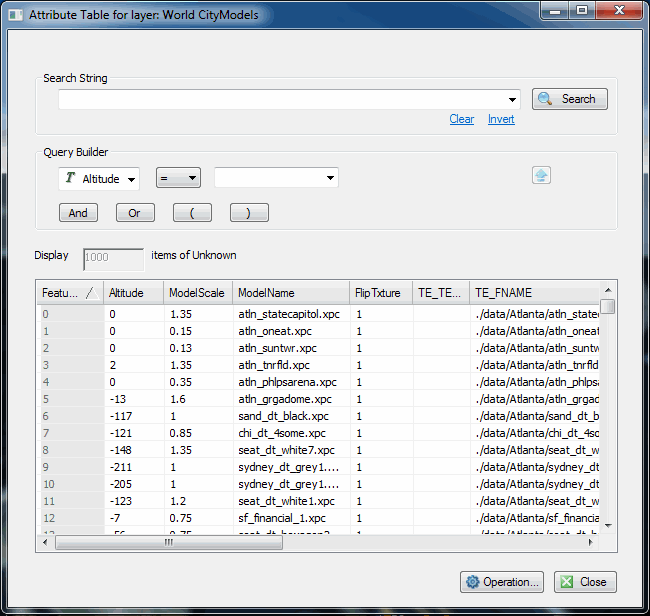
The Attribute Table enables you to search the layer attribute database files and display the results in the 3D Window. You can use this table to fine-tune the information that is displayed on the terrain or to create a new project layer or file based on the filtered layer. For example, you can display all towns in Western Europe, which have a population of 20,000.
Using the Attribute Table, you can easily edit the attribute values of multiple features without opening separate property sheets for each feature.
Search expressions are comprised of one or more conditions. A condition consists of an attribute, an operator and an attribute value.
There are three types of attributes:
§ String
§ Integer
§ Double
Each attribute type has its corresponding operators.
A search expression can consist of more than one condition. In this case, you need to insert a connector between the conditions to specify their relations. In addition to AND, you can use the OR, NOT and [] connectors to define the relations between conditions.
To search and perform operations by attribute:
1. In the Project Tree, select the required layer.
2. On the Feature Layer tab, in the Attributes group, click Attribute Table.
3. If you want to search for a previously-searched-for search expression, select one from the Search String dropdown list, and skip to step 6.
4. In the Query builder section, enter an attribute, condition, and value and click Insert String![]() . The search expression is displayed in the Search String field.
. The search expression is displayed in the Search String field.
Note: All attribute values are listed in the value dropdown list.
Note: If you want to clear the Search String field, click Clear.
5. If you want to include additional strings in your search expression, click one of the connector buttons: ![]() and repeat step 4 for the next condition.
and repeat step 4 for the next condition.
Search6. Click . Your search results are displayed in the search results list at the bottom of the page.
7. For each attribute value that you want to modify, double-click and type the required value.
8. Do any of the following:
§ To select a feature: in the Feature ID column, select the required Feature ID. Use CTRL-click or SHIFT-click to multi-select. This feature will remain selected even when the Attribute Table is closed.
§ To fly to a feature, right-click the feature’s row in the attribute table, and select Fly to selected item.
§ To edit a feature’s other attribute values and XY coordinates, right-click the feature’s row in the attribute table, and select Edit item. The feature’s property sheet is displayed.
§ To delete a feature, right-click the feature’s row in the attribute table, and select Remove items from layer.
§ To create a new layer composed only of the features which matched the search criteria: click the Operation button and select Add as New Layer Entry. The new layer is added to the Project Tree
§ To modify attribute properties: double-click the attribute value and modify as required. In the 3D Window, the plane flies from the current location directly to the selected feature.
§ To set the visibility of features based on their attribute values using the search expression entered in steps 3-5: click the Operation button and select Set Visibility by Attribute. The features matching the search criteria and their annotations are displayed on the terrain, and the Visibility property is saved in the project. If you want to redisplay all features, click the Operation button and select Clear Visibility by Attribute.
Note: All visibility by attribute settings are saved to Visibility property in the layer’s property sheet under both the Annotation and Feature tabs. You can also set visibility by attribute directly from the layer’s property sheet. See the Visibility property in “Polyline Property Sheet Parameters” and “Polygon Property Sheet Parameters” in the “Objects and Labels” chapter.
§ To save the filtered layer to a file: do the following:
i. Click the Operation button and select Save As.
ii. In the Save As dialog that is displayed, select the file type (.sqlite, gpkg, .shp, or .pdf).
iii. Browse to the required file directory, and type a file name.
iv. If you are saving the layer as an .sqlite, .gpkg, or .pdf file, type a Layer name.
v. Click Save.