Creating and editing a presentation
Presentations consist of a series of actions, which are organized into steps, to help you structure your presentation. Some of these actions define a customized flight route while others control the particular display of the project. Each action is added to the presentation from the "Create new action" dropdown list in the toolbar at the top of the Presentation Editor. This dropdown list as well as the other commands in the toolbar at the top of the Editor only display when the presentation has been stopped. When a presentation is playing or paused, the Editor displays without the top toolbar.
An action in the presentation editor can be edited by right-clicking it and selecting Edit.
Opening the presentation editor
The Presentation Editor lets you create a new presentation or edit an existing one:
§ To create a new presentation, on the Home tab, in the Add group, click Presentation. Then in the presentation control panel, click Open Presentation Editor  .
.
§ To edit an existing presentation, in the Project Tree, click the presentation name, and then in the presentation control panel, click Open Presentation Editor .
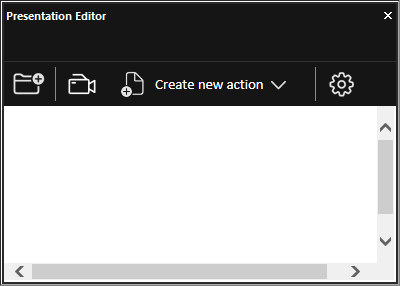
Presentation Editor
Creating presentation steps
Presentation steps act like "chapter" headings, grouping presentation actions and letting viewers quickly jump between parts of the presentation, using the Previous and Next buttons on the playback panel. This allows viewers to skip over certain presentation actions and focus on the content that's most relevant to them.
To create a step:
1. On the Presentation Editor’s top toolbar, click Create New Step  . A new step is added to the Presentation Editor.

Creating New Steps in Presentation Editor
2. Type the name of the new step.
3. Set Requires Click to True to require a user click to advance to this step. Set this property to False to advance automatically.
4. Drag actions between steps as required.
Creating a locations route
You can manually create a route by defining a list of locations, each containing full flight information. TerraExplorer Pro generates the route by connecting the locations in sequence to form a continuous path. When a new location is created, it is added to the end of the actions list in the Presentation Editor. It can then be dragged and dropped into the required position in the list. If you want to add a location at a specific point, not at the end of the current list, select the action after which you want to add the location, and then select Create New Action.

Presentation Editor
To create a route using locations:
1. In the Presentation Editor, in the Create New Action dropdown list, select Fly to Location/Object. The current location is added to the presentation.
2. To change location, do either of the following:
§ Fly to the required location and then in the Presentation Editor, click Click to Use Current Position. The Fly to action’s property sheet in the Presentation Editor is updated with the coordinates of the current location.
§ Drag and drop a location or an object from the Project Tree into the Presentation Editor. The Fly to action’s property sheet in the Presentation Editor is updated with the name of the location or object.
3. Enter a Flight Time. This determines the duration of the flight (in seconds) from the previous location to the location currently being defined. If no flight time is entered, the presentation will jump directly to the location. When playing a presentation from the beginning, TerraExplorer jumps directly to the first location regardless of the flight time defined for it in the Presentation Editor.
Creating a recorded route
Use the recorded route to fly through the terrain and save the exact path you followed. During playback, the route will be recreated precisely with the same timing between each location as when you recorded it.
Note: Recorded routes do not capture screen overlay, field of view, sky color, or clouds coverage. These depend on the settings that are set before the presentation is played and will vary each time the presentation is played based on the settings at the time.
To record a flight:
1. In the Presentation Editor, in the Create New Action dropdown list, select Record Route. The Presentation Editor’s top panel displays Start and Cancel buttons.
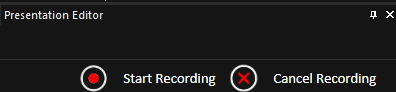
2. Click Start Recording and then navigate in the 3D Window, setting your desired route. Fly freely through the terrain (using the mouse, keyboard, navigation controls, ribbon controls, joystick or Jump to Location panel), fly to a specific object or fly to a location. You can control the direction and tilt angle of the camera, slide to the sides, and zoom in and out. See the "Navigating in the 3D World" chapter for more information.
3. When you complete the flight path, on the Presentation Editor top panel, click Stop Recording. The route is added at the end of the Presentation Editor list. It can then be dragged and dropped into the required position in the list.
Following and restarting a dynamic object
You can follow a dynamic object in your presentation.
To follow a dynamic object:
1. In the Presentation Editor, in the Create New Action dropdown list, select Restart Dynamic Object.
2. Drag and drop the dynamic object you want to follow from the Project Tree into the Presentation Editor.
3. In the Follow Dynamic Object property sheet at the bottom of the Presentation Editor, select an Operation:
§ Restart - Restarts the dynamic object from the beginning of its route but does not fly to the location of the dynamic object or follow the object.
§ Follow – Flies to the location of the dynamic object and then follows it.
4. Set the Follow Time in seconds.
Setting wait times, transitions and sequence
After creating a presentation, you can open the Presentation Editor to adjust the order and timing of the presentation’s actions and steps. By default, transitions between steps are manual (requiring a user click), but this can be overridden. Transitions between actions within a step are always automatic. To control the timing of actions, you can insert a "Set Wait Time" between them.
Note: While a presentation is playing, you cannot edit actions/steps in the Presentation Editor.
To edit step/action transitions and order:
1. In the Presentation Editor, drag actions/steps to reorder steps as required.
2. If you want to delete a step, right-click it and click Delete. Use CTRL-click to multi-select steps for deletion.
3. If you want a step to follow automatically after the previous one, select the step in the Presentation Editor, and in its property sheet, set Requires Click to False.
4. To set the wait time between two actions, in the Presentation Editor, in the Create New Action dropdown list, select Set Wait Time. Then enter the number of seconds to wait in the Wait Properties dialog.
Displaying required content on application screen
A presentation’s customized flight route can be combined with a particular display of the project's content. For example, you can set the visibility of groups, objects, and messages during different points in the presentation, or show slope and contour maps and shadows. These actions are added to the presentation from the Presentation Editor’s "Create New Action" dropdown list. After a new action is created, it is added to the end of the actions list in the Presentation Editor. It can then be dragged and dropped into the required position in the list. To add an action at a specific point, not at the end of the current list, select the action after which you want to add an action, and then select Create New Action.
The following actions are available:
§ Show or hide objects or groups
§ Set time
§ Turn underground mode on or off
Show or hide objects or groups
To show/hide an object or group:
1. In the Presentation Editor, in the Create New Action dropdown list, select Show Object or Group or Hide Object or Group. The Show/Hide property sheet is displayed on the bottom of the Editor.
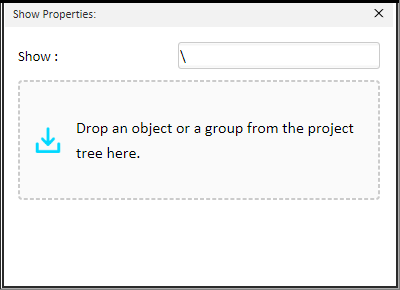
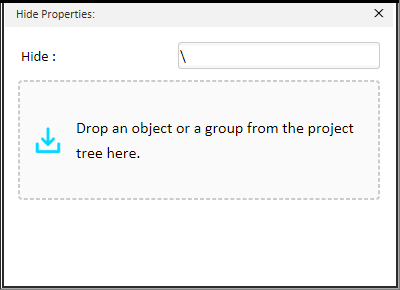
Show/Hide Object Property Sheet
2. Drag and drop an object or group from the Project Tree into the Presentation Editor.
Add captions
You can add a caption to a presentation. The captions are added at the bottom of the 3D Window.
To add a caption to a presentation:
1. In the Presentation Editor, in the Create New Action dropdown list, select Create Caption.
2. In the Caption property sheet at the bottom of the Presentation Editor, type the caption's text.
3. Select the Lifespan for the caption:
§ Step – Entire step.
§ Time – For the number of seconds entered in the Duration field.
§ Until Replaced – Leave caption displayed until a new caption action in the presentation.
4. If you want to hide the last added caption while the presentation continues to run, in the Presentation Editor, in the Create New Action dropdown list, select Clear Caption.
Display messages
To display a message:
1. In the Presentation Editor, in the Create New Action dropdown list, select Create Message Object. The Create Message dialog is displayed.
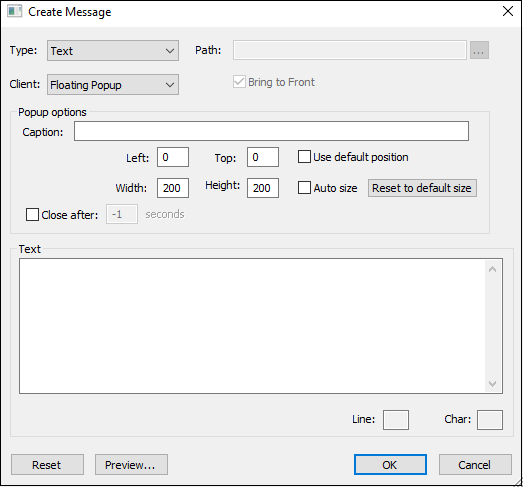
Create Message Dialog
2. Create the required message. In the Create Message dialog, you can define the number of seconds that the message should display and the position of the message object in the 3D Window. See "Using the Create Message Dialog" in the "Working with Objects" chapter for information.
3. If you want to edit the message after closing the dialog, at the bottom of the Presentation Editor, click Edit Message Object in the Create Message Dialog.
Set time
TerraExplorer time settings affect the visibility of objects and groups with set timespans.
To set TerraExplorer date and time:
1. In the Presentation Editor, in the Create New Action dropdown list, select Set Time.
2. In the property sheet at the bottom of the Presentation Editor, set the time and date.

Set Date and Time
Turn underground mode on or off
To set underground mode on:
1. In the Presentation Editor, in the Create New Action dropdown list, select Turn Underground Mode On/Off.
2. In the property sheet at the bottom of the Presentation Editor, set the Underground Mode to True to turn it on or to False to turn it off.
Play another presentation
You can launch another presentation from the current presentation.
To play another presentation within the current presentation:
1. In the Presentation Editor, in the Create New Action dropdown list, select Play Another Presentation.
2. In the property sheet at the bottom of the Presentation Editor, drag and drop a presentation from the Project Tree into the Presentation Editor.
Note: The secondary presentation’s settings are independent of the primary presentation’s settings. So for example, the play speed factor or looping mode set in the primary presentation do not affect these settings in the secondary presentation.
Show or hide slope map
You can show or hide the global slope map.
To show or hide the slope map:
1. In the Presentation Editor, in the Create New Action dropdown list, select Show/Hide Slope Map.
2. In the property sheet at the bottom of the Presentation Editor, set Display to True to show the map or to False to hide it.
Show or hide contour map
You can show or hide the global contour map.
To show or hide the contour map:
1. In the Presentation Editor, in the Create New Action dropdown list, select Show/Hide Contour Map.
2. In the property sheet at the bottom of the Presentation Editor, set Display to True to show the map or to False to hide it.
Show or hide shadows
You can show or hide shadows.
To show or hide shadows:
1. In the Presentation Editor, in the Create New Action dropdown list, select Show/Hide Shadows.
2. In the property sheet at the bottom of the Presentation Editor, set Display to True to show shadows or to False to hide them.
Setting presentation options
Presentation options are set from the Settings command, in the Presentation Editor.
To set presentation options:
1. In the toolbar, at the top of the Presentation Editor, click Settings  . The Presentation Editor displays a list of presentation settings.
2. Set the following:
§ Loop Presentation – Set to True to automatically restart the presentation when the end of the presentation is reached.
§ Auto Play – Set to True to automatically start the presentation when the project is opened.
§ Play Speed Factor – Set a play speed factor to increase or decrease the playback speed of the presentation.
§ Waypoint Slowdown – A value between 0 and 1 that defines how much the camera decelerates when reaching a waypoint. At 0, the camera continues through waypoints without slowing, moving directly to the next point. At higher values, the camera eases into each waypoint, creating smoother transitions.
Loading a KML with a tour element
A KML with a tour element that is loaded into a TerraExplorer project will open as a TerraExplorer presentation that can be edited (modify the route, add captions and operations, etc.) and played just like any natively-created one.
To load a KML layer:
§ On the Layers tab, in the Complex Layer group, click the required layer type. Then in the Browse for feature layer dialog that is displayed, browse to the required file and click Open.
The following KML Tour tags are supported:
§ <gx:Tour> <gx:Document>
§ <gx:PlayList> <gx:Tour>
§ <gx:FlyTo> <gx:PlayList>
§ <gx:duration> <gx:FlyTo>
§ <gx:flyToMode> <gx:FlyTo>
§ <Camera> <gx:FlyTo>
§ <gx:AnimationUpdate> <gx:Tour>