Feature Layer Operations
The following feature layer operations are available:
§ Exporting Selected Features to a New File
§ Moving Features from the 3D Window
§ Cutting, Copying, and Pasting Features
Exporting Selected Features to a New File
To export selected features to a new layer:
1. Select the required features either by selecting them in the 3D Window or by spatial query. See “Selecting Features from the 3D Window” and “Spatial Queries” in this chapter for information.
2. On the Feature Layer tab, in the Load and Save group, click the arrow next to Save Layer and select Save Selected Features As. The Save As dialog is displayed.
3. Type a File name.
4. Select a file type (.sqlite, .gpkg, .shp, or .pdf).
5. If you are saving the layer as an .sqlite, .gpkg, or .pdf file, type a Layer name.
6. Browse to the required Save location and click Save.
Adding a Feature to a Layer
To add a feature to a layer:
1. Select the layer.
2. On the Feature Layer tab, in the Edit group, click Add [Polyline, Point, or Polygon]. The [Polyline, Point or Text Label] property sheet opens. The geographic features that can be added depend on the type of feature layer.
3. Set the parameters of the geographic feature [polyline, point, or polygon].
4. In the 3D Window, place the object’s points by clicking in the desired location. You must place at least two points for a polyline and three points for a polygon. See "Editing Objects in the 3D Window" for information on editing feature objects.
5. Finish the object insertion by right-clicking.
6. Continue to edit the object’s parameters, and set the feature’s attribute values, or close the property sheet to finish the operation.
Deleting Selected Features
To delete selected features:
1. Select the required features either by selecting them in the 3D Window, by spatial query, or by using the Attribute table. See “Selecting Features from the 3D Window”, “Spatial Queries”, and “Using the Attribute Table Tool” in this chapter for information.
2. On the Feature Layer tab, in the Edit group, click Editing and select Delete.
Merging Features
The Merge command combines features lying on the same plane from a single polyline or polygon layer into one feature. When merging overlapping polygons, a single part feature is created that is the union of the merged features. When non-overlapping polygons or polylines are merged, a multipart feature is created with one set of attributes.
To merge selected features:
1. Select the required features either by selecting them in the 3D Window or by spatial query. See “Selecting Features from the 3D Window” and “Spatial Queries” in this chapter for information.
Note: Only polylines and polygons can be merged.
2. On the Feature Layer tab, in the Edit group, click Editing and select Merge.
3. In the 3D Window, select the feature whose attributes should be used for the merged object by clicking it.
Clipping Features
The Clip command creates a new feature by clipping away from a specified polygon or polygons the area that overlaps with the clip polygon. The polygons must all be from a single layer and lie on the same plane.
To clip a polygon:
1. Select the required polygons either by selecting them in the 3D Window or by spatial query. See “Selecting Features from the 3D Window” and “Spatial Queries” in this chapter for information.
2. On the Feature Layer tab, in the Edit group, click Editing and select Clip.
3. In the 3D Window, select the polygon to clip from the other polygons by clicking it.
Intersecting Features
The Intersect command creates a new feature from the common areas of any two polygons. You choose which feature's attributes will be preserved during the operation. The polygons must all be from a single layer and lie on the same plane.
To create a polygon from the intersection of other polygons:
1. Select the required polygons either by selecting them in the 3D Window or by spatial query. See “Selecting Features from the 3D Window” and “Spatial Queries” in this chapter for information.
2. On the Feature Layer tab, in the Edit group, click Editing and select Intersect.
3. In the 3D Window, select the polygon that determines the attributes by clicking it.
Exploding Features
A selected multi-part feature can be separated into its individual, component features using the Explode command.
To explode a multi-part feature:
1. Select the required multi-part feature. See “Selecting Features from the 3D Window” in this chapter for information.
2. If you want to separate all the features, on the Feature Layer tab, in the Edit group, click Editing and select Explode All.
3. If you want to separate out only specific features, do the following:
a. On the Feature Layer tab, in the Edit group, click Editing and select Explode.
b. In the 3D Window, select a feature from within the selected area that you want to separate out.
c. Repeat steps a and b for each object you want to separate.
Moving Features from the 3D Window
A single feature or multiple features can be moved in the 3D Window.
To move a feature(s):
1. Select the required features either by selecting them in the 3D Window or by spatial query. See “Selecting Features from the 3D Window” and “Spatial Queries” in this chapter for information.
2. If you selected a single feature, on the top bar of the object’s property sheet, click XY Plane ![]() .
.
3. If you selected multiple features, right-click and select Move from the shortcut menu. The multi-edit property sheet opens.
4. In the 3D Window, place the cursor over the feature or the selection frame. The cursor changes to Move mode ![]() .
.
5. Click the feature(s), and drag it to the required location in the XY Plane. Release the left mouse button to set the feature(s) at the current location.
Note: You can also move the feature(s) by modifying the coordinate information in the property sheet.
Cutting, Copying, and Pasting Objects
You can copy or cut one or more objects in the 3D Window and paste them in another location. All cut/copied objects are placed in a buffer for future pasting, until new objects are copied/cut. Objects pasted from the Feature Layer Clipboard are pasted as new features in the selected layer. If you want to generate new objects, rather than features, you can instead paste the objects from the Home tab Clipboard.
Using advanced clipboard mechanisms, you can generate any 2D or 3D object based on the geometry of the objects in the clipboard (e.g., generate buildings according to properties of selected polygons). These objects can be saved either as a TerraExplorer group of objects or as a new feature layer (shapefile).
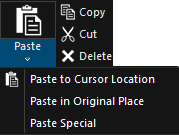
Copy Paste Ribbon Commands
Copying and Pasting Features
To copy and paste features:
1. On the Feature Layer tab, in the Selection group, toggle on Select Feature.
2. To copy: In the 3D Window, place the cursor over the required feature, and type CTRL + C.
Note: You can also select the feature, and use the ribbon commands on the Feature Layer tab or the right-click menu to copy and paste.
3. To paste:
§ To cursor location – Type CTRL + V. A copy of the feature is pasted in the current location of the cursor, and the cursor mode changes to the last positioning mode (i.e., XY, Z or XYZ Magnet) that you used, so you can drag the pasted feature to the required location. Click the left mouse button to set the pasted feature in its place. See "Changing the Position of an Object" in the "Working with Objects" chapter for information.
§ In original place – On the Home tab, in the Edit group, click the arrow below Paste, and then click Paste in Original Place.
Note: The copy paste function produces different results when the clipboard is accessed from the Home tab rather than the Feature Layer tab. See “Cutting, Copying, and Pasting Objects” in the “Working with Objects” chapter for more information about copying and pasting objects from the Home tab. Note that copying can be performed from one tab and pasting from the other, but that certain information will not be retained in the process, e.g., if you copy objects using the Home tab clipboard and paste them from the Feature Layer tab as features into a layer, only the geometry of the objects will be applied. Likewise, if you copy features from the Feature Layer tab and then paste them from the Home tab clipboard, they will be pasted as standard TerraExplorer objects that are not part of the copied layer and therefore do not include layer and attribute data.
4. If you want to generate a 2D or 3D object based on the geometry of the features in the clipboard, do the following:
a. Click the bottom half of the Paste button, and then click Paste Special. The Paste Special dialog is displayed.

Paste Special Dialog
b. Select the Destination Object that you want to generate, and then modify its properties as required in the Property sheet.
c. Select whether to paste the object as an object or layer:
· Paste as Objects – Create a group that contains an object for each copied feature object.
· Paste as Layer – Create a new feature layer that contains a feature for each copied object.
d. Click Paste.
Cutting and Deleting Features
You can cut or delete one or more features.
Note: When you “cut” a feature in the 3D Window, the object is stored in the copy/cut buffer until a new copy or cut command is performed, so you can still restore it by performing the paste function. When you “delete” a feature, however, you cannot restore it.
To delete a feature object or objects:
1. Select the required feature/s either by selecting them in the 3D Window or by spatial query. A yellow frame surrounds each feature object. See “Selecting Features from the 3D Window” and “Spatial Queries” in this chapter for information.
2. On the Feature Layer tab, in the Clipboard group, click Delete.
OR
On the Feature Layer tab, in the Edit group, click Editing and select Delete.
To cut a feature:
1. Select the required feature/s either by selecting them in the 3D Window or by spatial query. A yellow frame surrounds each feature object. See “Selecting Features from the 3D Window” and “Spatial Queries” in this chapter for information.
2. On the Feature Layer tab, in the Clipboard group, click Cut.