Using the Photo Viewers (Main and Secondary)
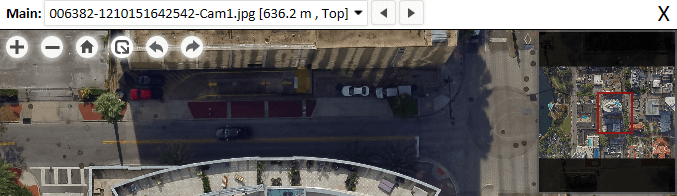
After selecting a point of interest, the Photo Inspector selects the most relevant photo and zooms in to the selected point on the photo in the photo viewer. The selected point is marked by a blue crosshairs ![]() on the photo and on the 3D model. All the photos looking at the point that meet the criteria listed above, are listed in the Photo Inspector under the main and secondary viewers:
on the photo and on the 3D model. All the photos looking at the point that meet the criteria listed above, are listed in the Photo Inspector under the main and secondary viewers:
The Photo Inspector includes two viewers as described below. In Settings, you can set whether to show only a single viewer (main) or whether to show also a secondary viewer:
§ Main photo viewer – If only one viewer is set, then the main viewer shows all photos. If two viewers are set, then the main viewer shows either only RGB photos or only photos looking at the point of interest from the front and above (depends on the secondary photo viewer settings).
§ Secondary photo viewer – The secondary photo viewer is used to display alternative photos to the main viewer. There are two options for the secondary viewer:
§ From Alternative Direction: Photos looking at the point of interest from the left, right, and behind.
§ Non-RGB Photos: If the project contains RGB and non-RGB collections, the secondary viewer can be used to view the non-RGB photos (e.g., NIR, thermal). In this case, the main viewer displays RGB photos from all angles and the secondary viewer displays non-RGB photos from all directions.
Switching Between Single and Multiple Viewers
To switch between single and multiple viewers:
§ On the Photo Inspector toolbar, click ![]()
![]() to toggle between a single viewer (main) and two viewers (main and secondary). You can also toggle on/off this option from the Settings dialog (Show secondary viewer )
to toggle between a single viewer (main) and two viewers (main and secondary). You can also toggle on/off this option from the Settings dialog (Show secondary viewer )
Selecting the Photos to be Displayed
To set the photos to be displayed in the secondary viewer:
§ In Settings, select either of the following:
§ From alternative direction - Photos looking at the point of interest from the left, right, and behind
§ Non-RGB collections - e.g., NIR, thermal
Attaching the Secondary Viewer to the Main Viewer
Attaching the secondary viewer to the main one links the two viewers so that the secondary viewer moves to focus on the same center point as in the main viewer, whenever you drag or zoom in the main viewer. If the center point doesn't exist in the photo shown in the secondary viewer, a black photo is displayed.
To attach the secondary photo viewer to the main viewer:
§ In Settings, toggle on the Attached to Main option.
Viewing the Inspection Point in the Photos
After selecting a point of interest, the Photo Viewer’s Photo Inspector lists show the most relevant photos according to the Max Results per Viewer setting.
To view the inspection point in the photos, do any of the following:
§ Select a photo in the viewers' dropdown photo lists.
§ Use the Next/Previous buttons ![]() or the keyboard shortcuts “<”, “>” to browse through the photos.
or the keyboard shortcuts “<”, “>” to browse through the photos.
§ In the 3D Window, click any camera icon to display the photo associated with it in the relevant viewer (main or secondary).
§ Use the Photo Inspector's on-screen controls to inspect a photo in the viewer:
§ ![]() and
and ![]() to zoom in and out
to zoom in and out
§ ![]() and
and ![]() to rotate left and right
to rotate left and right
§ ![]() zoom out to see entire photo
zoom out to see entire photo
Note: The Toggle Full Page ![]() command is disabled in this version.
command is disabled in this version.
§ Hover over a photo in the main or secondary viewer to display a virtual cursor ![]() on the 3D model in the 3D Window in the same location. This virtual cursor indicates the location of the hovered position on the photo.
on the 3D model in the 3D Window in the same location. This virtual cursor indicates the location of the hovered position on the photo.