Using screen overlay
There are several controls and indicators that can be displayed in the 3D Window to orient you and help you navigate:
§ Scale
To display/hide a screen overlay element:
§ On the View tab, in the Screen Overlay group, select/clear the required element’s check box.
Navigation controls
The navigation controls and virtual joystick enable you to rotate, tilt or zoom in or out of the terrain, free fly in the 3D World and change direction. See "Navigating Using On-Screen Navigation Controls" in the "Navigating in the 3D World" chapter for more information.
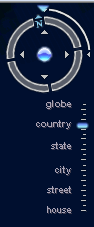

Navigation Controls
Center sign
The Center Sign displays the 3D Window center point.

Center Sign
Status bar
The status bar displays:
§ The longitude, latitude, altitude, and direction of the cursor in the 3D Window. Clicking on the status bar opens the Jump to Location panel.See "Jump to Location Panel" in the "Navigating in the 3D World" chapter for further information.
§ The current terrain buffering level in a graphical format. The display quality indicator represents the current terrain resolution for the area shown in the 3D Window, compared to the estimated maximum resolution available in the terrain database. The graphic bar indicates values from 0%-100% of quality.
§ Copyright text (See "Screen Overlay" in the "Setting the Project" chapter).

Status Bar
Scale bar
The scale bar shows the ratio of a distance in the 3D virtual World to the corresponding distance in the actual world.
Date and time slider
The Date and Time Slider enables you to modify the current date and time so you can view each area of terrain in the date and time range that you require. If the sun is used as the project’s light source, the displayed light on the terrain corresponds to the sunlight there is on the terrain at the hour and date indicated by the blue marker on the slider. The objects displayed on the terrain at each selected time correspond to the timespans that were set for these objects. The timespan for an object or group can be set in its property sheet.
Note: Project startup settings for the date and time can be set in the Atmospheric Effects tab in the Project Settings dialog. See "Date and Light Effects" in the "Setting the Project" chapter for information.
To use the Date and Time slider:
1. On the Home tab, in the Environment group, click Time Slider. The Date and Time slider is displayed on the upper left corner of the 3D Window.
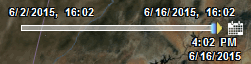
Date and Time Slider
2. You can display TerraExplorer elements for a particular time and date or for a time range.
§ If you want to display data for a specific time and date, drag the blue marker and yellow arrow  together to the required date and time on the slider.
§ If you want to display data whose timespans fall anywhere in a time range, drag the blue marker to the start point of the time range and the yellow arrow to the endpoint of the time range  . See "Timespan" in the "Working with Tools" chapter for more information on timespans.
Note: The yellow arrow displays on the time slider only when the Project time range or Automatically adjust range to selected item settings are selected in the Date and Time Setting dialog. See below.
Note: If the sun is used as the project’s light source, the displayed light on the terrain corresponds to the sunlight there is on the terrain at the hour indicated by the blue marker.
3. Click Date and Time Settings  to the right of the slider to select a mode. The Date and Time Setting dialog is displayed.
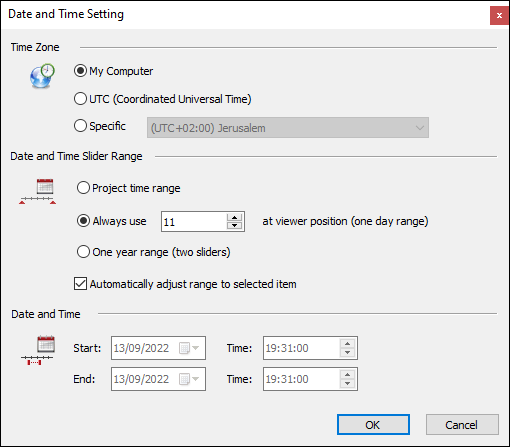
Date and Time Setting Dialog
4. Select one of the following time zones. The time zone you select determines which time zone is used for the time you select in the Date and Time Setting section in the same dialog.
§ My computer -Your local time zone.
§ UTC (coordinated Universal Time) - UTC time (GMT + 0:00).
§ Specific - The time zone you select from the dropdown list.
5. Control the interval of time for which you can view objects and features with timespans by selecting a date and time range for the date/time slider:
§ Project time range
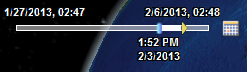
The slider’s time range corresponds to the project’s time range. Date and hour adjustments are both made on the same slider.
§ Always use <> at viewer position

The slider’s time range is 24 hours.
This option also requires you to select a specific time which will be the default current time (until the time is changed on the slider).
§ One year range (two sliders)
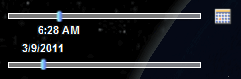
The time slider’s range is 24 hours and the date slider’s range is one year.
6. If you want the date and time sliders ranges to automatically readjust to correspond to the timespan of the selected item, select the Automatically adjust range to selected item check box.
7. Set the project’s current time and date or time range.
Note: The current date and time can only be set when Project time range is selected above and there are objects or groups in the project for which timespans were set.
§ If you want to set a specific current time and date, set the same Start and End Date and Time. The blue marker and yellow arrow are displayed together on the slider .
§ If you want to set a current time range so that all objects and features whose timespans fall anywhere in the range display, set a Start Date and Time, and then set an End Date and Time. The blue marker on the slider indicates the Start Date/Time and the yellow arrow indicates the End Date/Time .
Note: Start and end date and time must be within the project range.