Monitoring a Build
PhotoMesh Build Manager has two sections for monitoring the current build:
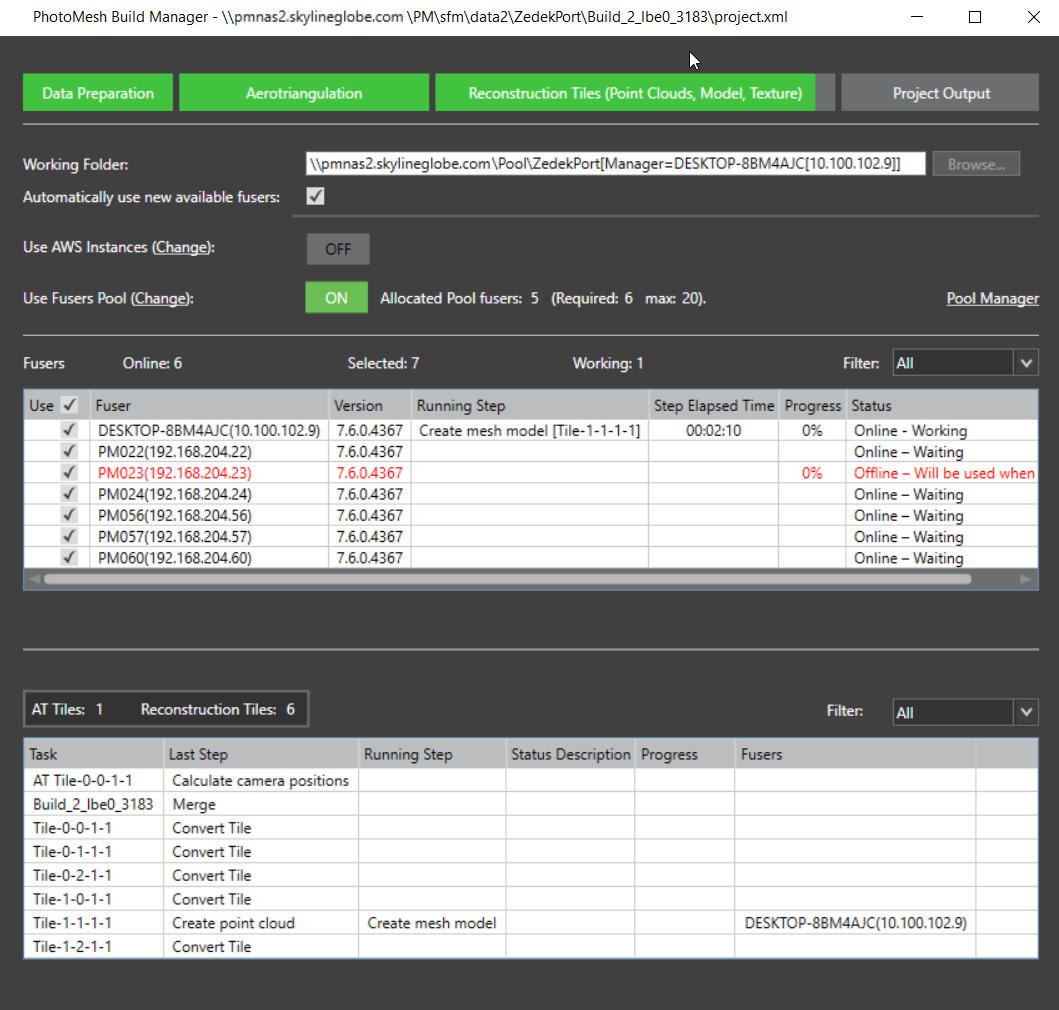
§ The upper monitoring section of PhotoMesh Build Manager displays information for each fuser, including status, its currently running step, and its progress for that step.
§ The lower monitoring section of PhotoMesh Build Manager displays information for each aerotriangulation and reconstruction tile, including currently running step, last step, progress, and currently running fusers.
To monitor the build:
1. In the upper monitoring section of PhotoMesh Build Manager, from the Filter dropdown list, select one of the following:
§ All – To view all fuser information
§ Selected – To view only information related to selected fusers.
2. The following data is available in the upper monitoring section for each of the available fusers:
|
Field |
Description |
|
Fuser |
Fuser name. |
|
Running Step |
Step that the fuser is currently processing. |
|
Step Elapsed Time |
Time that has elapsed since the currently processing step was started. |
|
Progress |
Percentage of currently running step that has been completed. |
|
Status |
Fuser status: § Online – Working – Online and processing § Online – Waiting – Online but not currently processing § Offline – Will be used when online – Fuser was either disabled or closed. |
3. In the lower monitoring section of PhotoMesh Build Manager, from the Filter dropdown list, select one of the following:
§ All – to view all task information.
§ Errors – to view only information related to task errors.
4. The following data is available in the lower monitoring section:
|
Field |
Description |
|
Task |
All project tasks including a list of AT and reconstruction tiles. |
|
Last Step |
The previous step that was performed |
|
Running Step |
Step that the fuser is currently processing. |
|
Status Description |
Information about the build status. |
|
Progress |
Percentage of currently running step that has been completed. |
|
Fusers |
Fuser that is currently processing this task. |
PhotoMesh Build Manager – Monitoring a Build
5. If you want to view a production report, click Production Report. See "Viewing a Production Report" in the "Reviewing Your Build" chapter.
6. If you want to view build settings (read-only), click Show Settings.
7. When the build process is complete, the Build Finished dialog is displayed.
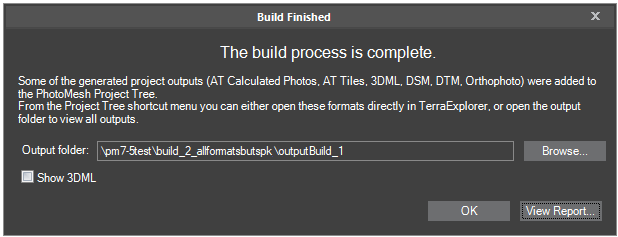
Build Finished Dialog
8. If you want to open the output folder, select the link in the Output Folder field, and open it in your browser.
Note: The output folder can also be opened at any time from the Build Outputs list. See "Opening Build Output in TerraExplorer" in this chapter for more information.
9. If a 3DML was created in this build, and you want to show it in the 3D Window, click Show 3DML.
Note: The 3DML’s display can also be turned on or off by toggling the Visible check box in the Build Outputs list.
10. If you want to view a production report, click View Report.
Canceling a Build
To cancel a build:
§ On the bottom right of PhotoMesh Build Manager, click Cancel.
Resuming a Build
A PhotoMesh build process can be resumed in any of the following cases:
§ The initial build process was canceled by the operator in the middle.
§ Unexpected hardware or software failure occurred during the build causing the build to stop
To resume a build:
Note: You can only resume a build when you are in Review mode for that build.
1. If you are not in Review mode, on the Home tab, in the Review group, click Review Mode.
2. On the Home tab, in the Process group, click the arrow under Build and select Resume Build.
Note: If you want to create an entirely new build, see "Creating a New Build" in this chapter for information.