Loading Layers from Other Feature Servers
In addition to SkylineGlobe Server, you can also load feature layers from the following servers:
|
Server |
Description |
|
Web Feature Server (WFS, WFS-T)
|
WFS is a standard protocol published by the Open Geospatial Consortium (OGC) for serving geographical features over the Internet. TerraExplorer supports WFS 1.0.0, 1.1.0, 1.1.1, and 2.0.0. A WFS service with transactions (WFS-T) allows WFS clients to apply edits (inserts, deletes and updates) to the data in the source database through the WFS service. |
|
TerraGate SFS (WFS) |
Skyline’s TerraGate SFS Server efficiently streams feature layers (Legacy support). |
|
Esri ArcSDE |
The Spatial Database Engine (SDE) is a client/server application that enables feature layers to be stored, managed and retrieved from database management systems like Oracle, Microsoft SQL Server, Sybase, IBM DB2 and Informix. Loading of layers from ArcSDE is only supported through ArcSDE 10.2 (Esri deprecated the application server connection method after this version). From ArcSDE 10.3 and above, layers can be loaded using the WFS/REST services. |
|
Oracle Spatial |
Oracle Spatial (formerly called SDO, and before that MultiDimension), provides a way to store and retrieve multi-dimensional data in Oracle. It is primarily used for Geographical Information Systems to implement geo-reference and solve queries such as how is something related to a specific location. Note: In order to load an Oracle Spatial layer you must have an Oracle Client installed on your computer. |
|
SQL Spatial |
Microsoft SQL Server Spatial Database provides support for access to spatial tables in Microsoft SQL Server 2008+ which contains the geometry and geography data types to represent the geometry columns. |
|
PostgreSQL with PostGIS
|
Postgre SQL is an object-relational database management system (ORDBMS). It is released under an MIT-style license and is thus free and open-source software. It supports a large part of the SQL standard and offers many features: § Complex queries § Foreign keys § Triggers § Views § Transactional integrity § Multiversion concurrency control PostGIS adds support for geographic objects to the PostgreSQL object-relational database. In effect, PostGIS "spatially enables" the PostgreSQL server, allowing it to be used as a backend spatial database for geographic information systems (GIS). PostGIS follows the OpenGIS "Simple Features Specification for SQL" and has been certified as compliant with the "Types and Functions" profile. Note: Transactions are not currently supported for layers loaded directly from a PostgreSQL database. |
|
ArcGIS GeoServices REST Server |
Esri’s ArcGIS GeoServices REST (Representational State Transfer) Server relies on a stateless (generally HTTP), client-server, cacheable communications protocol. This allows fast performance, reliability, and the ability to grow, by re-using components that can be managed and updated without affecting the system as a whole, even while it is running. |
|
MongoDB |
MongoDB is a NoSQL document-oriented database that stores data in JSON-like documents with optional schemas. |
To load a feature layer from a server:
1. On the Home tab, in the Add group, click Feature Layer. The Browse for Feature Layer dialog is displayed.
Browsing for the Feature Layer Dialog
2. In the From Server section, select the server type. A connection parameters dialog is displayed.
3. Enter the required connection parameters for the specific server or database, and click Connect. See “Connection Parameters” in this chapter for information.
4. Select a layer from the Select Layer dialog and clickNext. See “Select Layer Dialog” in this chapter for information. For SkylineGlobe Server layers, see “Loading Layers from SkylineGlobe Server” in this chapter for information.
Note: For ArcGIS GeoServices REST Server layers, the layers are selected directly in the connection parameters dialog, and loaded into the project.
5. Set the Layer’s General Settings and click Next. See “Selecting General Layer Settings” in this chapter for more information. The Layer Settings dialog is displayed.
6. Select the attribute fields to load, set layer and layer object parameters, and apply different properties such as line color or cylinder height, based on the attribute field values of the objects. See “Loading Layer Attribute Fields”, “About Basing Native Feature Layer Properties on Layer Attribute Fields”, and “Setting and Editing Feature Layer Properties ” in this chapter for information.
Connection Parameters
§ Logging In to a SkylineGlobe Server
§ Connecting to a Web Feature Server or a Skyline Feature Server
§ Connecting to the ArcSDE Server
§ Connecting to an Oracle Spatial Server
§ Connecting to an SQL Spatial Server
§ Connecting to a PostgreSQL Database
§ Connecting to an ArcGIS GeoServices REST Server
§ Connecting to a MongoDB Database
Logging In to a SkylineGlobe Server
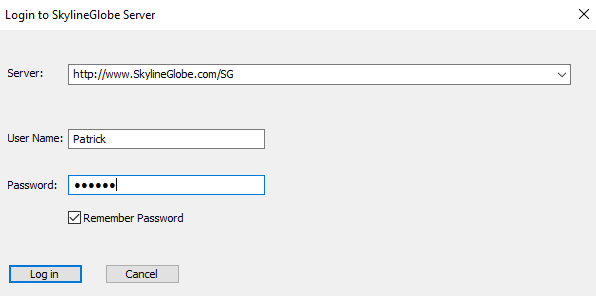
Logging In to SkylineGlobe Server Dialog
To log in to a SkylineGlobe Server:
Note: If you are already logged in to a server and want to log in to a different one, first log out of the first server: on the top right of the application ribbon, click the arrow next to the User Name of the logged in user, and select Log out. Then log in to the required server with the required login information.
1. Enter the login information and click Log In:
|
Parameter |
Activity |
|
Server |
The Server Host Name, which is the IP address of the server. |
|
User Name |
User name to access the server (mandatory). |
|
Password |
Enter the password. |
|
Remember Password |
Select this option to save the password. The password will be remembered and will be displayed in asterisks the next time the SkylineGlobe Server dialog is displayed. |
The values that you enter for Server and User Name are saved. The next time you load this window, this information is automatically filled in.
2. If the connection to the server is successful, the SkylineGlobe Layers dialog opens from which you can load a layer into the project. See the “Working with SkylineGlobe Server” chapter for more information.
Connecting to a Web Feature Server or a Skyline Feature Server
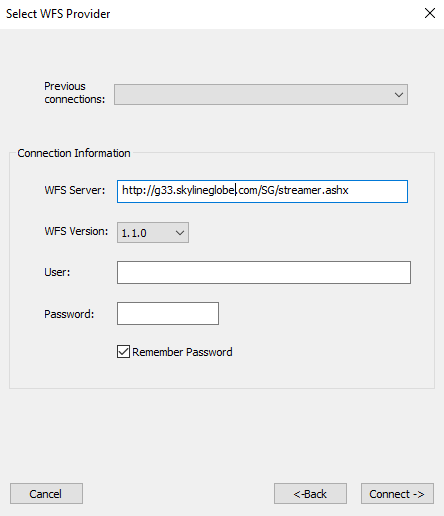
Select WFS Provider Dialog
To connect to a Web Feature Service Server or a legacy TerraGate SFS Feature Server:
1. Enter the connection information:
|
Connection Information |
Description |
|
Previous Connections |
Displays information from any previous connection you made in the past. |
|
WFS Server |
Enter the current URL link if not provided in the Previous Connections field. |
|
WFS Version |
Select the WFS version. WFS 1.0.0, 1.1.0, 1.1.1, and 2.0.0 are the currently supported versions. |
|
User |
Enter your WFS Server user name. |
|
Password |
Enter your WFS Server password. |
|
Remember Password |
Select this option to save the password. The password will be remembered and will be displayed in asterisks the next time the Select WFS Provider dialog is displayed. |
The values that you enter are saved. The next time you load this window, all the information is automatically filled in.
2. If the connection to the server is successful, click Next. The Select Layer dialog opens in which you set the layer properties and parameters. See “Select Layer Dialog” in this chapter for more information.
Connecting to the ArcSDE Server
Connect to ArcSDE Server Dialog
To access data from ArcSDE server, TerraExplorer requires access to specific ArcSDE components (dynamic link library files): sde.dll, pe.dll and sg.dll, of versions 10.0, 9.3 or 9.2. For versions 9.2 and 9.3, msvcr71.dll is also required. These files are installed with various Esri components, including ArcGIS Desktop and ArcSDE SDK, as well as the free viewers, ArcGIS Explorer Desktop and ArcReader. See http://www.esri.com/products/index.html#free_viewers_panel
To allow TerraExplorer to access these files, do any of the following:
§ Make sure an ARCGISHOME or AGSDESKTOPJAVA environment variable is defined on your system and includes a reference to a folder under which a bin folder exists with the above-mentioned files.
§ Make sure a PATH environment variable is defined on your system and includes a reference to a folder under which a bin folder exists with the above-mentioned files.
§ Copy the DLL’s to the main TerraExplorer folder.
To connect to an ArcSDE Server:
Note: If you are already connected to a server and want to connect to a different one, first click the Disconnect button, then fill in the new server connection information. You can now connect to the new server.
1. Enter the connection information:
|
Connection Information |
Description |
|
Previous Connections |
Displays information from any previous connection you made in the past. |
|
Server |
Server name (mandatory). |
|
Instance |
Instance name. |
|
Port |
Port number. You must fill in either the instance name or the port number. |
|
Database |
Database name (optional). |
|
ArcSDE 8.x, 9.x |
Select the ArcSDE 8.x check box to indicate connection to an ArcSDE 8 or an ArcSDE 9 database. |
|
User |
User name to access the server (mandatory). |
|
Password |
Enter the password. |
|
Remember Password |
Select this option to save the password. The password will be remembered and will be displayed in asterisks the next time the Connect to ArcSDE Server dialog is displayed. |
The values that you enter are saved. The next time you load this window, all the information is automatically filled in.
2. If the connection to the server is successful, click Next. The Select Layer dialog opens in which you set the layer properties and parameters. See “Select Layer Dialog” in this chapter for more information.
Note: After a connection with ArcSDE Server has been established the connection to the database remains open as long as you do not exit TerraExplorer, or click the Disconnect button.
Connecting to an Oracle Spatial Server
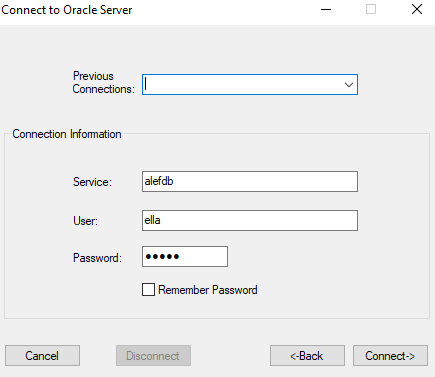
Connect to Oracle Spatial Server Dialog
To connect to an Oracle Spatial Server:
Note: If you are already connected to a server and want to connect to a different one, first click the Disconnect button, then fill in the new server connection information. You can now connect to the new server.
1. Enter the connection information:
|
Parameter |
Activity |
|
Previous Connections |
Displays information from any previous connection you made in the past. |
|
User |
Enter the user name. |
|
Password |
Enter the password. |
|
Remember Password |
Select this option to save the password. The password is remembered and displayed in asterisks the next time the Oracle Spatial Server dialog is displayed. |
|
Service |
The Net Service name. |
The values that you enter are saved. The next time you load this window, all the information is automatically filled in.
2. If the connection to the server is successful, click Next. The Select Layer dialog opens in which you set the layer properties and parameters. See “Select Layer Dialog” in this chapter for more information.
Note: After a connection with Oracle Spatial Server has been established, the connection to the database remains open as long as you do not exit TerraExplorer, or click the Disconnect button.
Local Naming: Local naming is a method used to resolve a simple name, a net service name, to a connect descriptor that the client uses to connect to a database or service. Local naming stores net service names and their connect descriptors in a local tnsnames.ora file.
In order to connect to a Service it must be configured in the tnsnames.ora file.
Connecting to an SQL Spatial Server
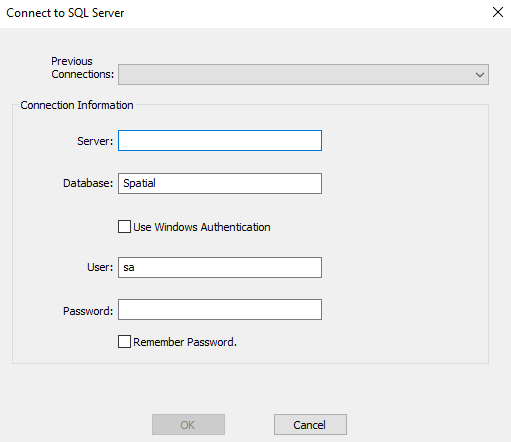
Connect SQL Server Dialog
To connect to an SQL Spatial Server:
1. Enter the connection information:
|
Parameter |
Activity |
|
Previous Connections |
Displays information from any previous connection you made in the past. |
|
Server |
The Server Host Name, which is the IP address of the server. |
|
Database |
Database name (optional). |
|
Use Windows Authentication |
When the Use Windows Authentication check box is selected, the SQL Server OLE DB provider will request a secure (or trusted) connection to a SQL Server running on Microsoft platform. The SQL Server will use integrated login security to establish connections using this data source, regardless of the current login security mode at the server. Any login ID or password supplied is ignored. The SQL Server system administrator must associate your login with a SQL Server login ID. When cleared, the SQL Server will use standard login security to establish connections using this data source. You must specify a login ID and password for all connection requests. |
|
User |
User name to access the server. Note: If the Use Windows Authentication check box is selected, the User name field is unavailable |
|
Password |
Enter the password. Note: If the Use Windows Authentication check box is selected, the User name field is unavailable |
|
Remember Password |
Select this option to save the password. The password will be remembered and will be displayed in asterisks the next time the SQL Server dialog is displayed. |
The values that you enter are saved. The next time you load this window, all the information is automatically filled in.
2. If the connection to the server is successful, click OK. The Select Layer dialog opens in which you set the layer properties and parameters. See “Select Layer Dialog” in this chapter for more information.
Connecting to a PostgreSQL Database
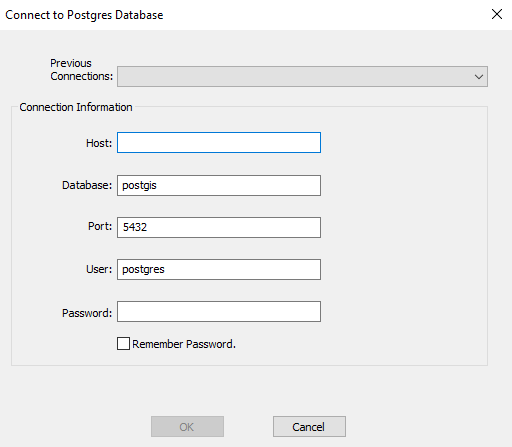
Connect to PostgreSQL Database Dialog
To connect to a PostgreSQL Server:
Note: If you are already connected to a server and want to connect to a different one, first click the Disconnect button, then fill in the new server connection information. You can now connect to the new server.
1. Enter the connection information:
|
Parameter |
Activity |
|
Previous Connections |
Displays information from any previous connection you made in the past. |
|
Host |
The Server Host Name, which is the IP address of the server. |
|
Database |
Database name (optional). |
|
Port |
Port number. |
|
User |
User name to access the server (mandatory). |
|
Password |
Enter the password. |
The values that you enter are saved. The next time you load this window, all the information is automatically filled in.
2. If the connection to the server is successful, click Next. The Select Layer dialog opens in which you set the layer properties and parameters. See “Select Layer Dialog” in this chapter for more information.
Connecting to an ArcGIS GeoServices REST Server
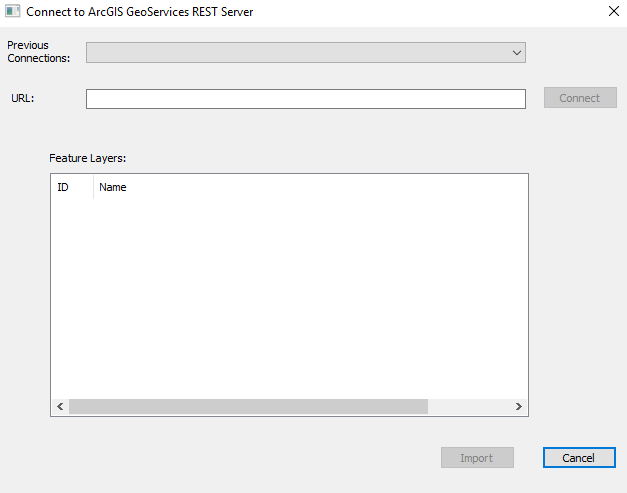
Connect to ArcGIS GeoServices REST Server Dialog
To connect to an ArcGIS GeoServices REST Server:
1. Enter the server’s URL.
2. Click Connect.
3. Select a layer, and click Import.
Connecting to a MongoDB Database
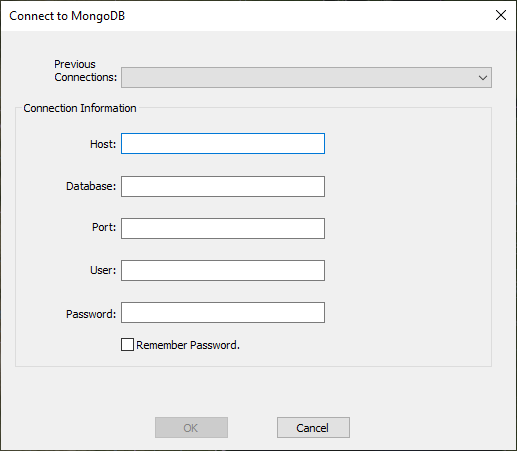
Connect to MongoDB Dialog
To connect to a MongoDB database:
Note: TerraExplorer currently supports MongoDB v3.
1. Enter the connection information:
|
Parameter |
Activity |
|
Previous Connections |
Displays information from any previous connection you made in the past. |
|
Host |
The database host name, which is the IP address of the server holding the database. |
|
Database |
Database name (optional). |
|
Port |
Port number. |
|
User |
User name to access the server (mandatory). |
|
Password |
Enter the password. |
The values that you enter are saved. The next time you load this window, all the information is automatically filled in.
2. If the connection to the server is successful, click OK. The Select Layer dialog opens in which you set the layer properties and parameters. See “Select Layer Dialog” in this chapter for more information.