Loading raster layers
Raster data is made up of pixels, each of which has its own value. TerraExplorer supports two types of raster data: geo-referenced, satellite or aerial images that overlay the terrain imagery and geo-referenced elevation raster that replaces the elevation data of the terrain database.
All raster layers are displayed in the coordinate system of the terrain database. If a layer is in a different coordinate system, TerraExplorer can automatically reproject the layer on the fly to the terrain’s coordinate system. If a source does not include coordinate system information, you should supply the coordinate system information so that TerraExplorer can reproject the layer.
A file can be of better resolution than the area on which it is placed. Automatic morphing between the terrain imagery and the imagery layer is performed on computers with Microsoft DirectX version 9.0 installed.
You can create imagery and elevation layers by referencing imagery and elevation data from:
§ Files on your own computer or on your local network.
§ A database that is served over a network by one of the supported servers.
Loading raster layers from file
The following file formats are supported:
§ Windows Bitmap (*.bmp)
§ ER-Mapper (*.ecw)
§ ER-Mapper Jpeg2000 (*.jp2, *.j2k, *.jpc))
§ ER-Mapper Server (*.ecwp)
§ GDAL (*.gif, *.ntf, *.jpg, *.jp2, *.j2k, *.jpc, *.tif, *.img, *.gpkg, *.webp, *.*, *.vrt, *.pdf, *.wcs)
§ HTC Raster file (*.htc)
§ Web Map server (*.wms)
§ Erdas Imagine (*.img)
§ Mip Terrain (*.mpt)
§ SkylineGlobe Server (*.tglobe)
§ Image MPU (*.li.mpu)
§ NGA formats (CIB, CADRG, ADRG)
§ No Stream formats (Bitmap, Jpeg, Gif)
§ ArcSDE Raster Server (*.sde)
§ MrSid (*.sid)
§ Tiff Format (*.tif, *.itiff)
§ Tile Text File (*.tlt)
§ Triangle elevation as color (*.tri)
§ Projection Text File (*.prj)
To add a raster source from file to a project:
1. On the Home tab, in the Add group, click the arrow next to Raster Layer, and select the required format or "More Formats and Servers"/ "Other Elevation Formats". The Load Imagery/Elevation Layer dialog is displayed.
2. Browse to the required file, and click Open.
Note: If you inserted a RAW, IMG (Erdas Imagine), or NGA format files, a dialog is displayed in which you can define properties for the relevant file type. If you inserted a GeoPackage format file, a dialog is displayed in which you can select the required layer.
Note: If you want to restrict your Browse list to files of a specific format, in the Files of type field, select the required format.
If the source file is geo-referenced it is located accordingly on the terrain. Otherwise, it is placed at the center of the 3D Window. You can then manually edit its position, or reproject it.
3. If the source file does not include coordinate system information or TerraExplorer cannot read it from the file, the Coordinate System dialog opens. Specify the coordinate system of the layer. See "Coordinate System Dialog" in the "Basic Concepts" chapter for information.
4. After the layer has been placed on the terrain, you can change its properties using the property sheet. See "Modifying raster layer parameters" in this chapter for further information.
Loading raster layers from raster servers
You can load raster layers from the following servers:
|
Server |
Description |
|
SkylineGlobe Server |
SkylineGlobe Server is a private cloud solution that supports the client-server data delivery requirements of Skyline's 3D technology. TerraExplorer can read streamed imagery and elevation layers (Imagery, Elevation, RasterComplex) and TBP projects. For more information on loading layers from SGS, see "Loading SkylineGlobe Layers" in the "Working with SkylineGlobe Server" chapter. |
|
Web Map Server / Web Map Tile Service |
WMS/WMTS are standard protocols published by the Open Geospatial Consortium (OGC) for serving georeferenced map images and pre-rendered georeferenced map tiles over the Internet. TerraExplorer supports WMS 1.1.1 and 1.3.0 and WMTS 1.0.0. |
|
Web Coverage Service (WCS) |
WCS is a standard protocol published by the Open Geospatial Consortium (OGC) for serving geospatial information, in forms that can be used as input for analysis and modeling. TerraExplorer allows use of coverage in a WCS server as a raster dataset and supports version 1.0.0 |
|
Oracle Spatial Database |
Oracle Spatial (formerly called SDO, and before that MultiDimension), provides a way to store and retrieve multi-dimensional data in Oracle. It is primarily used for Geographical Information Systems to implement, geo-reference and solve queries such as how is something related to a specific location. Note: In order to load an Oracle Spatial layer you must have an Oracle Client installed on your computer. |
|
ECW Image Web Server |
ECW Image Web Server serves over the Internet large images (greater than a Terabyte in size) with fine alternating contrast while retaining their visual quality. |
|
Esri ArcSDE Raster Server |
The Spatial Database Engine (SDE) is a client/server application that enables spatial data to be stored, managed and retrieved from database management systems like Oracle, Microsoft SQL Server, Sybase, IBM DB2 and Informix. Loading of layers from ArcSDE is only supported through ArcSDE 10.2 (Esri deprecated the application server connection method after this version). From ArcSDE 10.3 and above, layers can be loaded using the WMS/REST services. |
To load a raster layer from a server:
1. On the Home tab, in the Add group, click the arrow next to Raster Layer, and select the required server. The Browse for Imagery Layer/Elevation Layer dialog opens.
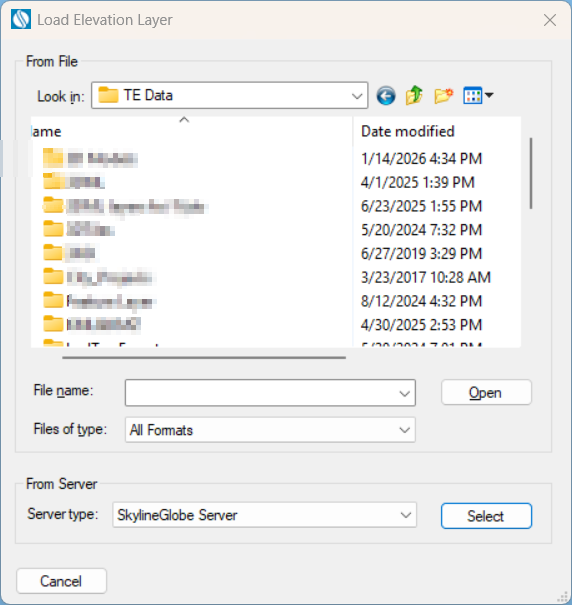
Load Imagery/Elevation Layer Dialog
2. In the Load Imagery Layer or Load Elevation Layer dialog, in the From Server section, select the server type. A dialog is displayed corresponding to the server selected.
3. Enter the information required for the selected server:
SkylineGlobe Server
You can load raster layers that are published to SkylineGlobe Server. For information on loading layers from SGS, see "Loading SkylineGlobe Layers" in the "Working with SkylineGlobe Server" chapter.
To add a layer from a SkylineGlobe server:
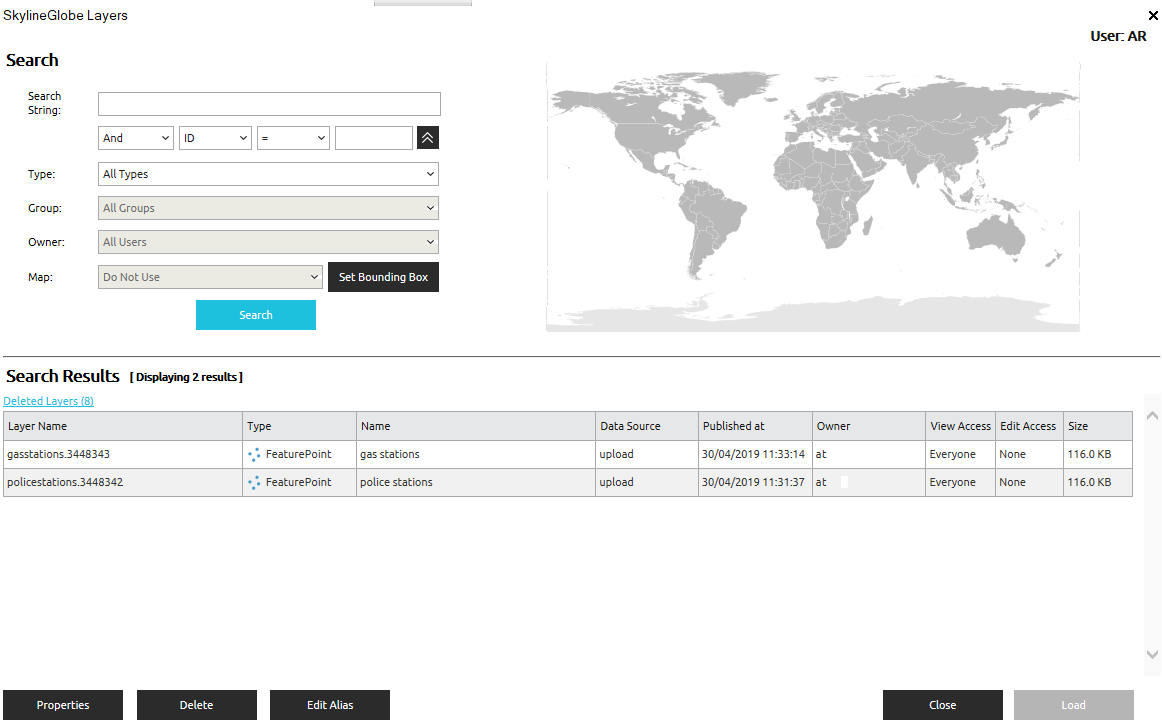
SkylineGlobe Layers Dialog
1. If you aren’t already logged in to the required SkylineGlobe Server, log in to the server. See "Logging In to a SkylineGlobe Server" in the "Feature Layers" chapter for information.
2. Search for the required layer. See "Searching for SkylineGlobe Layers" in the "Working with SkylineGlobe Server" chapter.
3. Select the layer you want to load, and click Load Layer.
Web Map Service/Web Map Tile Service
To load a layer from a Web Map server (WMS/WMTS):
Note: TerraExplorer supports WMS versions 1.1.1 and 1.3.0, and WMTS 1.0.0.
Note: The following is the copyright information for server address: "http://maps.opengeo.org/geowebcache/service/wms?" that is pre-configured in the server addresses list: "Map data © OpenStreetMap contributors, CC-BY-SA".
Web Map Server Browser Dialog
1. If you want to modify the Server Address list, do any of the following:
a. If you want to add a new address, click Add. The Add Web Map Server dialog opens.
i. Add a new address.
ii. If you want to add extra parameters (e.g., Token information) to the GetMap request, append the parameter at the end of the address using the following format:
SLGetMapExtraParam={"<extra_param>"}
where <extra_param> is the extra parameter for the GetMap request.
e.g., http://www.skylineglobe.com/SFS/streamer.ashx?service=WMS&SLGetMapExtraParam={"key=12345"}
This will add key=12345 to the GetMap request.
iii. Select the required service type.
iv. If you want to use RESTful request encoding, select Use RESTful requests for WMTS.
Note: Some servers may require the ArcGIS compatibility check box to be selected.
Note: Some servers may require the NASG (National Administration of Surveying, Mapping and Geoinformation of China) compatibility check box to be selected (e.g., used by Tianditu).
v. Click OK.
b. If you want to edit an address, select the address from the dropdown list, and click Edit. The Edit Web Map Server dialog opens. Edit the address and click OK.
c. If you want to remove an address, click Remove. A message is displayed asking you to confirm the deletion. Click Yes to delete.
2. From the Server Address list, select a server address.
3. In the Layers box, browse to the required data. The window on the right shows a preview of the data (when available).
4. In the Layer Details Sheet, set the properties according to the data supplier’s stipulations.
Property Sheet
|
Property |
Description |
|
SRS |
Spatial Reference System - Select the EPSG projection code indicating the projection in which the WMS/WMTS server is able to serve data. |
|
Lat-Long Units Per Pixel |
The best resolution level in degrees per pixel that is requested from the server. This field is only available when requesting a layer in SRS 4326 - geographic Lat-Long WGS84. |
|
Units Per Pixel |
The units per pixel (UPP) of the layer. |
|
Abstract |
A description of the layer (Read-only). |
|
Monochrome |
Add the layer as a black and white source. |
|
Image Format |
The format of the loaded layer –e.g., png or gif. |
|
Style |
Some layers can be displayed in more than one style (e.g., Points, Contours or Points and Contours) |
|
Transparent |
Select True to use WMS/WMTS layer as an overlay or False to use the WMS/WMTS layer as a base image. |
|
Background Color |
The layer’s background color. |
|
Name in Project |
The layer’s name in the Project Tree. |
|
Request Size |
The image size in pixels. |
|
Extra Parameters |
Extra parameters that are appended to any GetMap request, (e.g., Token information for requests to a token-secured WMS service). |
|
Layer Names |
The names of the selected WMS/WMTS layers (Read-only). |
|
Style Names |
Select the required style from the list of styles (if available) (Read-only). |
5. Click Open. The selected layer is added to the project and displayed in the Project Tree.
Oracle Spatial Database
To load a layer from an Oracle Spatial database:
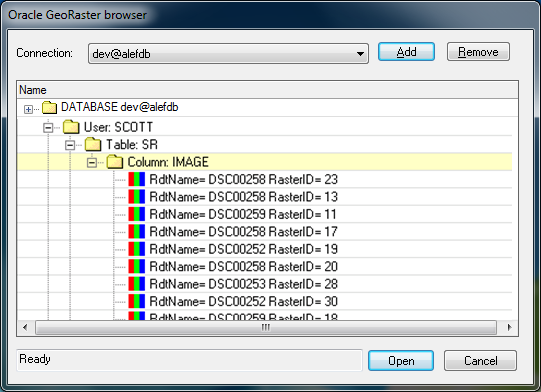
Oracle GeoRaster Browser
1. From the Connection list, select a connection.
Note: You can remove a connection from the list by selecting it and clicking Remove.
2. If you want to add a connection, click Add, and enter the parameters in the Oracle Connection Parameters dialog. See "Adding an Oracle Connection" in this chapter for more information.
3. Select the required layer file in the files hierarchy tree. The selected layer is added to the project and displayed in the Project Tree.
Adding an Oracle Connection
To add an Oracle Server connection:
1. In the Oracle GeoRaster Browser dialog, click Add. The Oracle Connection Parameters dialog is displayed.
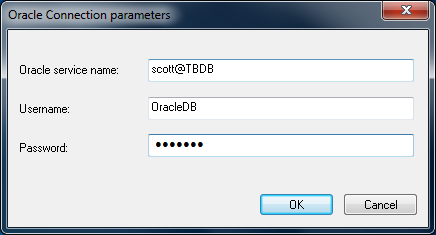
Oracle Connection Parameters Dialog
2. Define the following parameters:
|
Field |
Description |
|
Oracle service name |
The Net Service name |
|
User Name |
User name to access the server (mandatory) |
|
Password |
Enter the password |
3. Click OK. The new connection is added to the list.
ECW Image Web Server
To add a layer from ECW Image Web Server:
Add ECW Data Dialog
§ Enter the New Image Web Server address and click OK. The selected layer is added to the project and displayed in the Project Tree.
ArcSDE Raster Server
To add a layer from an ArcSDE Raster Server:
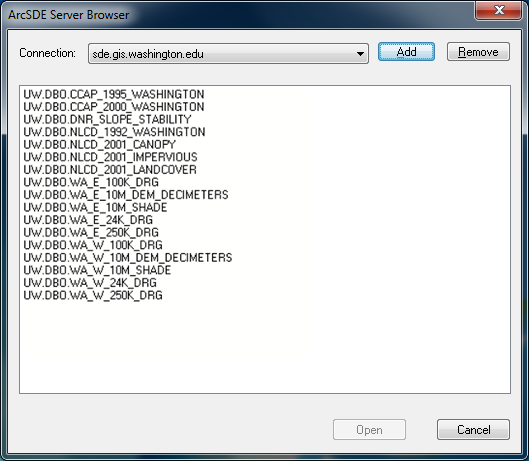
ArcSDE Server Browser Dialog
1. If you want to add an ArcSDE Server connection, click Add, and enter the parameters in the Database Connection dialog. See "Adding an ArcSDE Server Connection" in this chapter for more information.
2. From the Connection list, select a connection.
Note: You can remove a connection from the list by selecting it and clicking Remove.
3. Select one of the layer options and click Open. The selected layer is added to the project and displayed in the Project Tree.
Adding an ArcSDE Server Connection
To access data from ArcSDE server, TerraExplorer requires access to specific ArcSDE components (dynamic link library files): sde.dll, pe.dll and sg.dll, of versions 10.0, 9.3 or 9.2. For versions 9.2 and 9.3, msvcr71.dll is also required. These files are installed with various Esri components, including ArcGIS Desktop and ArcSDE SDK, as well as the free viewers, ArcGIS Explorer Desktop and ArcReader. See http://www.esri.com/products/index.html#free_viewers_panel
To allow TerraExplorer to access these files, do any of the following:
§ Make sure an ARCGISHOME or AGSDESKTOPJAVA environment variable is defined on your system and includes a reference to a folder under which a bin folder exists with the above-mentioned files.
§ Make sure a PATH environment variable is defined on your system and includes a reference to a folder under which a bin folder exists with the above-mentioned files.
§ Copy the DLLs to the main TerraExplorer folder.
To add an ArcSDE Server connection:
1. In the ArcSDE Server Browser dialog, click Add. The Database Connection dialog is displayed.
Database Connection Dialog
2. Define the following parameters:
|
Field |
Description |
|
Server |
Server name (mandatory) |
|
Service/Instance |
Service or Instance name |
|
Database |
Database name |
|
User Name |
User name to access the server (mandatory) |
|
Password |
Enter the password |
3. Click OK to connect to the server.
SGS Base Layers
You can load any of the SGS base layers configured for the SkylineGlobe Server that TerraExplorer is currently connected to.
To load:
1. If you aren’t already logged in to the required SkylineGlobe Server, log in to the server. See "Logging In to a SkylineGlobe Server" in the "Working with SkylineGlobe Server" chapter for information.
2. On the Layers tab, in the Raster group, click SGS Base Layer and select any of the available layers.